
In the Package
When you receive your Shark Guard, verify that nothing was damaged in shipping. Here is a current list of parts that should be included with a Delta ARK and Grizzly G1023 RT ARK. You won't find a printed manual inside the box. This is cost reduction to you. It's Greener and also allows you to get the most up to date information by viewing this online.
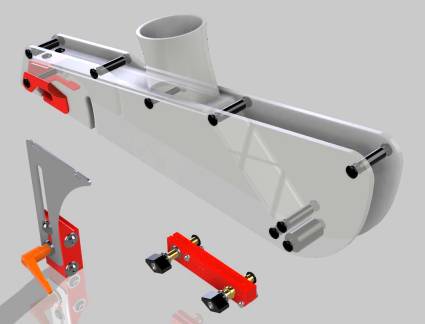
Your factory throat plate or blade plate will not work with this. Below is information about how to make your own throat plate or how to cut an aftermarket throat plate to work. We have no affiliation at all with them, but Leecraft makes a very good aftermarket throat plate for most saws.
You may want to make your throat plates first before you install the ARK riving knife. This may save you a few minutes if you intend to finish cutting the slot on the table saw. I do not recomend that method. There are easier safer methods and tools mentioned below.
They are also available on Amazon and other woodworking specialty stores. You can use the patterns above for everything but the slot. It is drawn in to show the typical length of the slot needed. Use your original throat plate as a guide when making the slots and measure your actual blade location in the throat opening for zero clearance plates. The patterns can be flipped if your slot is on the other side. The finger hole is at the front of the plate and is also arbitrary. It can be repositioned. Click this link for Leecraft throat plates.
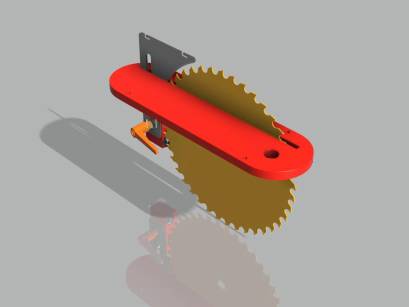
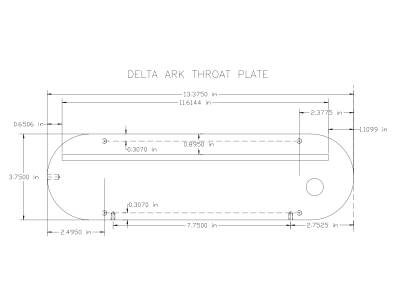
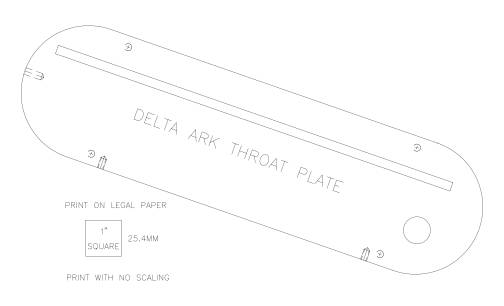
You may want at least two throat plates to start with. One would be the same width of slot as your original throat plate. The other would be a Zero Clearance throat plate. The wide slot in the plate will accomdate when you need to tilt the blade for bevel cuts.
Zero Clearance plates can only be used with the blade at 90 degrees to the table. You can make them for specific angles, but it is a lot harder to do that and install them. Special relief cuts would have to be made. Something not recommended for a novice.
The Leecraft plates above are made out of phenolic. That is probably overkill, but certainly a high quality material. Many other materials can be used. Aluminum, Baltic Birch plywood, MDF, hardwood, HDPE, etc. The sky is the limit if you have the proper material characteristics and the tools to make them with.
Tools used to make the slots can be a drill, jigsaw, dremel tool, multitool, scroll saw, coping saw, router table and even the table saw, but that isn't recommended. These slots do not have to be perfect to work correctly.
Preparing the saw for ARK Installation
DISCONNECT THE POWER SOURCE. NEVER COUNT ON YOUR SWITCH ALONE TO CONTROL THE POWER WHEN WORKING ON MACHINERY. THEY CAN FAIL.
Remove the saws throat plate or blade plate. It may also be easier to remove the blade now and set it aside.
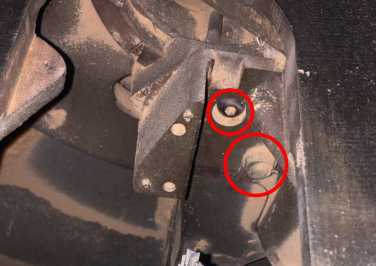
Remove any splitter or brackets that you have mounted now, by removing the mounting bolts. This includes the original rear guard mounting hardware. You will no longer need it with the Shark Guard. The large nut inside the saw next to the front mounting bracket is what held the rear mounts in place. This will also allow a nice outfeed table that doesn’t have holes in it.
Remove it and any other bolts that you see there holding any type of bracket.
What you are looking for will be a smooth trunnion casting with two threaded holes and the large hole left when the nut and rod are removed. (see last image)
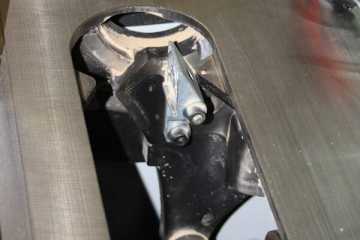
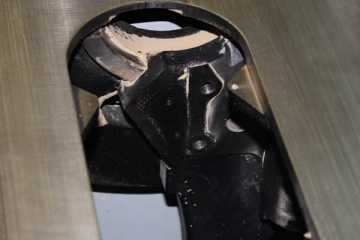
Manually adjusted riving knife
The manually adjusted riving knife is the heart of this guard system and will be used most often. Installation is the same for either left or right tilting arbors. I suggest you apply some Johnson's Paste wax or Minwax Paste wax to the riving knife. This should be done periodically to clean and protect the riving knife and to slick up the surfaces to reduce friction.
DISCONNECT THE POWER SOURCE. NEVER COUNT ON YOUR SWITCH ALONE TO CONTROL THE POWER WHEN WORKING ON MACHINERY. THEY CAN FAIL.
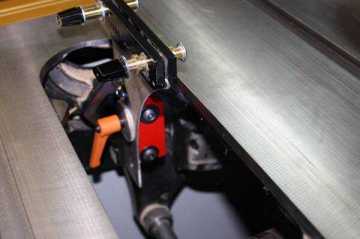
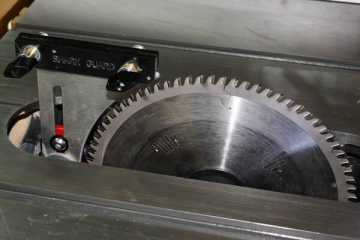
You will have to install the knife and mounting block according to the tilt of the blade. The images above show the setup for right tilt models. Left tilts would need to have the long bolts go into the block from the other side and reverse the riving knife direction. Remove your throat plate. It may also be easier initially to remove the saw blade as well. This would be a good time to clean out the inside of your saw and your blade.
Remove any splitter or brackets that you have mounted now, by removing the mounting bolts.
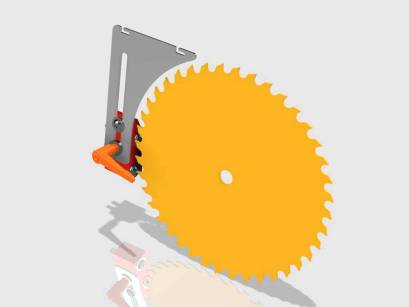
You adjust this riving knife by loosening the orange handle. It is spring loaded, so you can pull the handle out to reposition it on it's shaft for another turn when needed. It should just be loosened a bit for you to be able to move the knife up and down.
There is a warning label on all SGK1 shark guards that serve to help as a reminder to do this for you and others who may use the saw.
Riving Knife Alignment
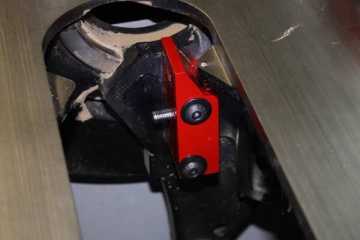
Install the red mounting bracket using two 2 inch button head screws and washers. (allen wrench provided in package) Snug these up just a bit, but not tight. There is some adjustment allowance in the slots of this bracket. It is used to align the riving knife to the blade. A straight edge or square can be used for this. It will help to remove the blade before installation. You may need to reinstall the blade a few times. No need to use the nut to check it with. Just hold it against the arbor flange.
The best or easiest way to accomplish alignment is to use a board to straddle front and back of the throat opening. Use spring clamps to clamp that board to the riving knife.
That will make alignment to the blade and vertical alignment easier I think.
Then snug the two mounting bolts and check.Once it is aligned with the blade, then snug up the screws and recheck.
Now you can raise the riving knife fully using the orange handle. The handle should be at 3 to 5 o'clock position for right tilts and 7 to 9 for left tilts when tight. Reinstall the blade a final time and tighten the nut as normal.
Adjusting the riving knife
It is probably best to initially raise the knife fully each time when raising the blade. That will allow you to adjust the blade at will without contacting the knife. Then you can set the knife. When you will be using the Shark Guard, leave the clamp on the knife and adjust that clamp height to your material being cut. Then adjust the blade up accordingly.
Insure that the blade is not contacting the riving knife. Generally no closer than .125 inches and no farther than .375 inches will provide the best results. Always do this with the saw turned OFF!
There is a hanger card shipped with the Ark models that warn against raising the blade with the saw blade spinning. That is bad practice anyway, but it can make the blade contact the riving knife and would be even more dangerous. Never raise the blade with it spinning. This card should hang behind the blade height wheel.
The Clamp assembly
The two slots on the top of the riving knife are used with this clamp. The three steel pins in the clamp. The two forward pins will be used with this ARK. These two pins in the clamp slip into the slots and lock down when the 2 knobs of the clamp are tightened. There are also set screws in one clamp half that serve to keep the two clamp halves parallel when tightening regardless of splitter thickness. You loosen the knobs and slide the clamp toward the rear of the saw and lift up. Installation is the reverse. This clamp helps to prevent lifting of the material depending on material thickness being cut depending on stock thickness.
Feeding the wrong thickness material can be dangerous. It can stop material in mid cut. Always check or adjust the guard height for material being cut.
Anti-kickback Pawls
The pawls are spring loaded aids against kickback. On the Shark Guard they can be locked in the up position when not wanted for delicate materials or when cutting lots of narrow strips. Otherwise they would be in the down position and ride on the stock being cut.
Using the tail hook
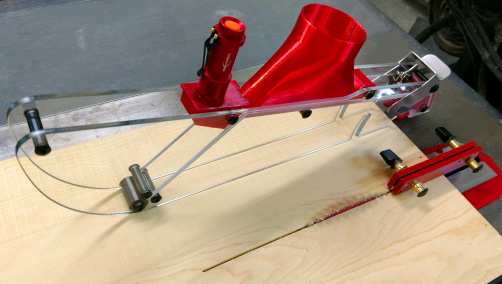
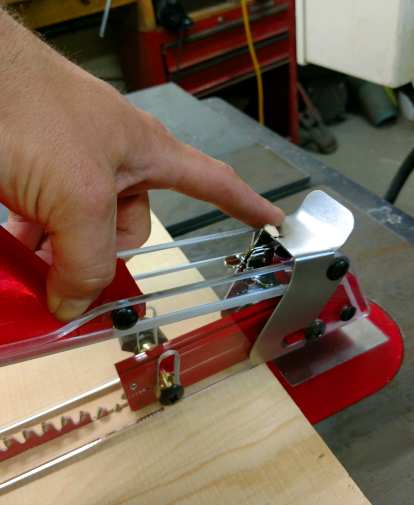
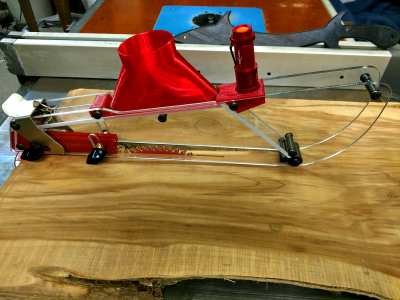
The Shark Guard has a horizontal hooked slot at the rear and a vertical slot forward. These slots are the mounting slots for this guard. The rear slots get hooked on the rear studs of the clamp. There is a safety hook that slips down over the rear stud to keep the guard from coming off when not intended. The newest version has a spring loaded latch design to keep the tail hooks locked in place.
You can see in this images that the guard can be left in the upward position by hooking only the rear slot and resting the guard on the front stud and brass bushings. This ability is beneficial when measuring between the fence and blade with a steel rule. The front slots just slip down over the front studs with care taken to use the smaller bushing diameters. With this done and your tail hook swung down into place, your blade guard is installed.
Using the Shark Guard
Here is a link to some video's that help to show how these guard are intended to be used. Watch the videos that deal with splitters.
This guarding system is designed to collect maximum dust during a cut, so the front roller underneath always rides on the stock. This helps prevent dust from getting slung forward by the blade on most cuts except at the very end of the cut and when cleaning up an edge. All guards with dust collection have trouble in those areas.
If you ordered a guard with a dust port, a dust collection hose can be hooked up to the top of the guard using a hose clamp or just by slip fit. The dust port to hose connection is usually a snug fit. I suggest that something be done to the port though. If left open, you can get a fountain effect of sawdust right into your face. For a good fit with something that is readily available, spray paint tops will serve as a good cap for the 2.5 inch dust port. Larger ports might be capped using various plastic lids or tops.
Dust collection installations
Rockler, Woodcraft and other outlets sell nice clear flex hose that fit these dust ports very well. If you leave the hose as a slip fit without a clamp, the hose can conveniently do duty on a router table as well.
If you are installing a larger hose, you should also include a blast gate in line and easily accessible. This really is a requirement for 4 inch ports and is a good idea for smaller ones. When you will be cutting material that will have a small offcut, the suction from the dust port can be so powerful that it will lift the small parts and it can get thrown into the dust hose or into the front of the guard with extreme force. This is undesirable and easily prevented with a blast gate.
There are numerous ways the you can support the hose for the dust collection. On my Gallery page, you will see some photo's of different setups. On my Review page, you will find links to individual websites where some owners used varied methods of supporting this hose. Here is a link with information on mounting the SGK1 overhead.
Care and cleaning of the Shark Guard
For splitters and riving knives, I suggest paste wax like Johnson's or Minwax to both clean and smooth the surfaces for less friction. On the guards we like to use Windex and a soft cloth to periodically keep the guard clear. Dust can build up inside and out, so it provides the best visibility when clean.
Replacement parts
Replacement, spare or upgrade parts can be ordered using this link. If you don't find what you need there, then just send an email.
Still have questions or concerns?
If you have any questions about installation, setup or usage of this blade guard or parts associated with it, please don't hesitate to contact us. We are happy to help insure your satisfaction and safe usage of these products. Thanks a bunch and I hope that you enjoy using your Shark Guard.
© Copyright 2002-2018. Leeway Workshop, LLC. All Rights Reserved
